Fried Green Zebra...Tomatoes!

IMG_1338TextWeb.jpg

Green Zebra tomatoes and fried green tomatoes are all a first for me. Unfortunately, I was too eager to cook them up before I could snap a portrait of the Green Zebra tomato to show you its beauty.

It’s vibrant green skin is vertically striped all around with a slight yellow hue. It’s perfectly taut, citrusy, and sweet.

The film title Fried Green Tomatoes popped in my mind straight away when I hovered over my little lovelies on the kitchen top. So there you have it…

Fried Green Tomatoes

INGREDIENTS//Yields 12-15 pieces

• 3 green tomatoes or Green Zebra Tomatoes, sliced 1/2 inch (approx. 1.3 cm) thick
• 1/2 cup (60 grams) corn starch
• 1 egg, whisked
• Half tablespoon crème fraîche (I didn’t have buttermilk but it is widely used in this recipe)
• 2 cups (100 grams) panko bread crumbs
• 1 tablespoon of mixed herbs and spices, your preference (I used cumin, paprika, oregano, salt and pepper)

Dip

• 125 grams greek yogurt (an individual container serving size)
• Half clove garlic
• 5 sprigs of parsley
• 1 lemon wedge
• Salt, adjust accordingly

PREPARATION

Mix the herbs with the corn starch in a bowl.

Add the crème fraîche to the egg and whisk in a separate bowl.

Add salt and pepper to the panko breadcrumb in another bowl.

Lay out the three bowls in the order you will use them: corn starch, egg, panko.
 

Dip

In a small blender or mixer combine all the ingredients and whizz it up.

Pour it into a small bowl, add salt to adjust accordingly.

INSTRUCTIONS

Pour some vegetable oil in a large skilet about a half inch deep.

Heat the oil over medium-high heat.

After the oil is heated start your tomatoes by going down the assembly line: dredge it in the corn starch, then dip it into the egg mix, and then completely coat with the panko, and place it gently in the heated oil.

Continue until the pan is almost full making sure not to overcrowd the tomatoes.

Fry each side until golden brown. Take it out and lay it on a wire rack or napkins to drain some of the oil.

Serve with the dip.


Risotto with Patty Pan Squash

It’s a bird…It’s a plane…It’s a patty pan! For those who don’t know, it’s a summer squash that has an eye catching disc-like shape, kind of like a flying saucer. Well, it certainly caught my eye. I mean, I’ve seen it before but never dared to buy it. It’s pretty and all but who knows what it’s like on the inside.

Mushroom and corn risotto served in a scallop shaped patty pan.

Mushroom and corn risotto served in a scallop shaped patty pan.

I am just resigned to own this vegetable since it turned up in my AMAP ( CSA ) basket this week so I started to procure recipes from my fellow Amapien members. There’s a photo of my AMAP pick-up spot here. It seems like most people like to make gratins out of things that are tasteless. I was beginning to wonder if this was what my scallop shaped squash had to offer me.

I was adamant on keeping its shell as a decorative serving piece so all I had to do was stuff it, right? I love eating rice with most anything so I decided on making a risotto since it’s creamy in its own right and not in a gratin-like way. It turned out to be a great combo. I kept the patty pan flesh cooking in its shell and simply scooped it out when cooked and left it inside. I then filled the shell up with the risotto and stirred it around to mix it up.

Patty pan squash tastes like a yellow squash to me. It has a very moist flesh so it helps keep the risotto light and loose.

Bon appétit!

Risotto Patty Pan Squash- 1109-.jpg

Risotto Patty Pan Squash

INGREDIENTS//Serves 3-4

• 1 patty pan squash per person if you want to stuff it in its shell (patîsson in French)
• 1 medium onion, diced
• 1 cob corn, boiled and cut into kernels (1 tin of corn kernels will work too)
• 300 grams risotto rice
• 75 milliliters white wine
• 1 liter vegetable stock or your stock of preference
• 2-3 tablespoons of Parmesan cheese, grated.
• 1 tablespoon butter
• 200 grams crimini mushrooms, cleaned and chopped (champignon de Paris rose is what I get in France)
• 1 lemon, zest
• 3-4 sprigs of flat parsley, leaves only

PREPARATION

Slice the top of the pattypan off so that it forms a lid. Scoop out the seeds. Place the pattypan cut side up in a baking dish with a half inch of water and drizzle some olive oil over the pattypan.

Boil a liter of water to prepare your stock so that it is ready when you start to cook the risotto.

Place your mushrooms in a baking dish, drizzle some olive oil and add the parsley to the mix and toss.

Let the boiled corn cool down. Stand the ear up on a flat side (cut it flat if need be) and hold the top of the ear with your hand while sawing downwards to cut off the corn. This will give you about a half cup of corn kernels. Place it aside until ready for use.


INSTRUCTIONS

Pre-heat your oven to 180 degrees Celsius (350 Fahrenheit).

Place the pattypan in the oven and let it cook for 35-40 minutes.

I place my mushrooms in the oven at the same time. It cooks more or less about the same time.

Roast the pattypan and mushrooms in the oven while starting the risotto (cook time is about 30 min).

In a large pan, heat up some olive oil over medium heat and then add the onions. Cook them for about 10 minutes. Do not brown them!

Add the risotto rice and stir with a wooden spoon. Move it around until the rice turns translucent.

Add the white wine. It will sizzle and it should start to evaporate. Continuously stir the rice (patience is the key to making risotto). Apparently, stirring releases its starch which gives it the creamy factor.

As the rice starts to dry up, add a ladleful of simmering stock and continue to stir. When it starts to thicken up and get starchy, add another ladleful of stock and stir slowly.

Keep repeating this process until the rice is cooked. Most or all of the stock will have been used.

When it is cooked, add some lemon zest, stir in the butter and then the Parmesan cheese.

Take the roasted mushrooms and combine it with the risotto. Add the corn kernels and stir.

Place the cooked pattypan on a serving dish or individual plate.

Take a spoon and scoop the flesh around in the pattypan.

Fill the patty pan with the risotto while mixing in the flesh inside the patty pan.

Adjust with black pepper.

Garnish with a little sprig of parsley and serve.


NOTE

You’ll have to buy a patty pan for each person if you want to serve and stuff the risotto in it. Otherwise, you can just scoop out the flesh of the one patty pan and combine it with the risotto towards the end and serve the portions directly on your plates.

Whole Grain Rice Vermicelli Salad

Whole Wheat Rice Vermicelli Salad-0993.jpg

These summer lovin' noodles are perfect for packing: camp, picnics, road trips, and what have you.  There's not much cooking going on with this noodle salad so it's an easy meal that is filling, yet light and fresh.

The farmer's market has an abundance and variety of fresh vegetables to offer during this season so you don't have to stick to the vegetables I used for this salad.   Please your palate and make your mix of vegetables with a whole grain rice vermicelli noodle.

Whole Grain Rice Vermicelli Salad

INGREDIENTS//Serves 3-4

• 100 grams whole grain rice or regular vermicelli
• 2 zucchinis, raw and noodle length ("zoodles")
• 2 small colorful bell peppers, raw and diced
• 2 cloves garlic, grated
• 1 lime, juiced
• 3 tablespoons, homemade kaeshi sauce
•  1 avocado, cubed
•  A bunch of flat parsley, leaves
• 2 stalks scallion, chopped
• 2 bunch (usually in 100 gram packs) enoki mushrooms, steamed, blanched, or raw

PREPARATION

Vermicelli noodles:  Follow the instructions on the back of your vermicelli noodle.  I soaked mine in water for 5 minutes and then rinsed it out with hot water.  Set it aside to cool down.

Enoki mushrooms:  Rinse them under cold water, then cut off the thick stem that holds them together and slightly separate them before steaming or blanching.


INSTRUCTIONS

Combine the zucchini, bell pepper, garlic, lime juice, and the kaeshi sauce in a large mixing bowl.

Add the noodles to the bowl, then the parsely and the avocado.  Toss gently.

Garnish with more parsley leaves, scallion, and enoki mushrooms.


NOTE

I used kitchen shears to cut down my noodles.  It makes it easier to serve and to eat.


Fennel and Lima Bean Salad

Summertime salad with fennel and lima beans.

Summertime salad with fennel and lima beans.

My typical Saturday starts by running out the door alongside my little guy pedaling away to his 9 a.m. tennis lesson on the other side of Canal de l'Ourq.   Our speedy start to the day after tennis includes picking up our weekly basket of veggies, coming home to unload and rinse them, taking a shower myself and then preparing lunch before heading back out to Chinese school all afternoon long (two kids+ an hour and a half of Chinese class per kid at two different time slots—you do the math!) 

My Saturday reprieve is usually the moment when I pick up my AMAP veggies.  AMAP is an organized community group of subscribers who support local family farmers.  It usually involves a subscription to a yearly contract and in return one gets weekly and seasonal non-treated vegetables.   It is here that I exchange cheek to cheek kisses with some of the other Amapiens, discover vegetables like céleri rave and topinambour, learn new French words like oseille and panais, and exchange simple recipes such as this fennel bean salad — both ingredients happen to be in my basket this week. 

So while I chitchat away, my little guy is getting his hands soiled while selecting and weighing out our vegetables on a classic mechanical scale with a proper dial and hand to add to our basket of the week.
 

Fennel Lima Bean Salad

INGREDIENTS//Serves 2

• 200 grams Lima Beans, tinned, frozen or fresh (if you are lucky!)
• 2 small fennel bulbs, sliced
• 1.5 tablespoon Greek yogurt (optional)
• 1 clove garlic, grated
• Half a bunch of coriander, roughly chopped
• A splash of lemon juice, fresh
• Olive oil, drizzle accordingly
• 1 teaspoon sea salt


INSTRUCTIONS

In a medium size saucepan add about 1/3 cup of water and some sea salt.

Add the fennel and cook over medium-high heat for 8-10 minutes.

Then drain the fennel.

If using tinned beans empty the content into the same saucepan, stir and heat the beans.

For frozen beans, just boil them.

If using fresh beans, pick them off their pods and boil them.   I was stuck with a wan layer of its shell so I just peeled it off.   I found it easier to peel off after it was cooked.

Drain the cooked beans, add the grated garlic, squeeze some lemon juice, and drizzle olive oil over it.

Combine the beans and fennel. 

Add the yogurt (optional) and coriander and stir everything together.

Adjust with some salt if necessary.


Simplified Gochujang Sauce In A Minute

Homemade simplified gochujang.

Homemade simplified gochujang.

I was making my Korean inspired dukbokki when I ran out of gochujang; a fermented, sweet, spicy, salty, and pasty Korean red chili sauce.   I wasn't about to let that ruin my dinner.   Throw me that curve ball and let's get that conundrum out of the way.  Comparing the  the back of the ingredients with a bit of research on the internet this simplified version turned out to be a quick fix to my evenings problem.

This is a minute made sauce opposed to traditional gochujang which goes through a long fermentation process.

This is a minute made sauce opposed to traditional gochujang which goes through a long fermentation process.

Homemade gochujang goes through a naturally fermented process over years in an earthenware.  Nowadays most people just buy the pasty sauce in a plastic tub.  Check the ingredients because they vary with each company that produces them.  Most contain MSG and have other preservatives in them but I do see some artisanale gochujang on the market.   If you really want to make traditional gochujang, here's a vid from an adorable Korean lady who shows us the real deal.  Mind you, patience is required for the good stuff at the end, minimum three months!


Gochujang Sauce

INGREDIENTS//Yields 2/3 cup (160 ml jar)

• 100 grams white miso paste
• 1/4 cup Korean red pepper powder
• 2 tablespoons mirin
• 1/4 cup honey
• 2 cloves garlic

INSTRUCTIONS

Combine all the ingredients in a small blender or a food processor and whizz it all up.

You should have a paste-like texture. 

Transfer to a jar for storage and seal it with a lid.


NOTE

I kept my small batch in the fridge for up to 2 weeks and it was fine.   You can use this sauce to marinate tofu, meats, and fish.  You can use it as a base for noodle soup, seafood and vegetable soups and stews.

Poached Egg With A Dallop of Sorrel Sauce

Poached egg on a bed of roasted beets and potatoes garnished with honey marinated kumquats.

Poached egg on a bed of roasted beets and potatoes garnished with honey marinated kumquats.

Oseille is French for sorrel.  It's a leafy, green plant that is usually used as an herb, added to accent a salad or cooked down and served along side with a fish.  In a French restaurant, sometimes on the menu we'll see some kind of fish name followed by à l'oseille offered as a main plate.

Poached eggs with a dallop of sorrel sauce.

Poached eggs with a dallop of sorrel sauce.

Another common recipe using these leaves is the omelette à l'oseille but my imagination took me another direction and I was starting to drool over the idea of piercing a warm poached egg with its yolk oozing over a bed of vegetables along with my kumquats which have been sitting on the side for day.  They weren't sweet enough for the kids to polish off.

With sorrel having such a zingy twist I marinated my kumquat discs in honey and mirin before introducing the two together.   I placed my poached egg on a bed of roasted beets and potatoes with a big dallop of sorrel sauce garnished with plenty of sweet marinated kumquats.  It was a very pleasing combination.    Definitely something I'll be preparing again.

Poached Egg With a Dallop of Sorrel Sauce

INGREDIENTS//Serves 2-3

• 3 free range eggs, poached
• 70 grams sorrel
• 20 grams butter
• 2 tablespoons crème fraîche
• Salt and pepper, adjust accordingly

PREPARATION

Remove the stalk from the sorrel.  You can chop the leaves or just leave them whole. 

INSTRUCTIONS

Heat up a small cast iron pot on medium to high heat and add some butter to it. 

Add the sorrel to the melted butter and cook it until it softens.  It will turn brownish in color.  Turn the heat off and add the crème fraiche.  

Adjust accordingly with salt and pepper.  Transfer the sauce into a small bowl and set it aside.

Poached Eggs

Bring a large pot of water to boil.

Crack your egg into a small cup or ramekin.

Once the water is boiled, lower the heat to a simmer.   

Using a spoon, give the water a swirl and gently pour the egg from the cup or ramekin into the center of the pot.

Let it sit for four minutes. 

Use a slotted spoon to lift it out of the water.

Drain as much water out of it as possible and serve.

Add a big dallop of the sorrel sauce on the egg or on the side and serve.


NOTE

Sorrel shrinks down a lot.  70 grams made me a small amount of sorrel sauce that fit in a ramekin.
When poaching eggs, be sure to use the freshest eggs otherwise the whites of the eggs won't form around the yolk as nicely.


Spicy Rice Cakes, Korean Style Dukbokki

Tubular shaped rice cakes with fresh vegetables.

Tubular shaped rice cakes with fresh vegetables.

I've been gluten free for a few months now.  In the beginning it was just part of my detox, dry January phase but now it's become a habit.    I've naturally reverted back to eating Asian food, so these days it's been rice over pasta—although I did buy a pack of gluten free pasta from Barilla the other day and I was pleasantly surprised by it!

Being gluten free has taught me to distinguish between which ingredients contain gluten or not.  Avoiding gluten has been relatively simple for me as most of the gluten free grains and other starch containing foods make regular appearances in my diet anyhow with the likes of rice, quinoa, amaranth, and buckwheat.

I'm discovering more of my favorite foods that are gluten free with a wee bit of adjustments made to them such as in this Korean spicy rice cake dish, dukbokki.


Korean style dukbokki

Korean style dukbokki

At times I am stumped by a product that has gluten in it like the gochuchang sauce I had on hand.  The sauce is pretty much the star of this dish otherwise I would have turned it into a Chinese stir fry dish with some other replacement sauce.  Disappointed with a raging craving, it was determined that I had to make my own gochujang sauce.   With luck on my side and some research it turned out to be pretty easy for me to whip up a homemade version of the sauce and I was able to enjoy this dish without gluten. 

A lot of the ready-made Asian sauces contain gluten or MSG so I've been on the hunt down for MSG free and/or gluten free sauces in Paris—organic would be nice too.  Anything I have found comes from the U.S. and costs a pretty penny for delivery.  So if anyone has any leads in Paris, please do let me know...

Spicy Rice Cakes, Korean Style Dukbokki

INGREDIENTS//Serves 3-4

• 400 ml or 1.5 cups dashi, katsuobushi dashi, or water
• 500 grams rice cake
• 1 carrot, matchsticks
• 1 zucchini, matchsticks
• 150 grams cabbage, chopped
• 100 grams Shimeji mushrooms

Sauce:

2 tablespoons gochujang (fermented red pepper paste)
1.5 tablespoons brown sugar
1.5 tablespoon tamari sauce or soy sauce
1 tablespoon sesame oil
1 clove garlic, minced

INSTRUCTIONS

In a large pan, bring your dashi broth to boiling point.

Lower the heat to medium, add the sauce and stir until it all disolves into the broth.

While the broth is boiling, add the rice cakes and let it cook for about 5 minutes.

Continue to stir from time to time so that it doesn't stick to the bottom of the pan.

Then add all the vegetables: carrots, zucchini, cabbage, mushrooms.

Cover the pan with a lid and let it cook for an extra 5 minutes or until it has softened.  Remember to keep stirring the rice cakes from time to time.  The vegetables should be cooked through but still retain a bit of crunch.

Garnish with some scallion and serve while hot.


NOTE

I used the tubular shaped rice cakes from the refrigerated section of the Asian supermarket which took about 10-12 minutes cooking time.

Cooking time depends on the type of rice cakes you use.  They can be purchased fresh, refrigerated, or frozen and they come in tubular shapes and sliced disc shapes.


Tricolored Tian With Provençal Vegetables

Tricolored Tian-9809.jpg

Today is Fête des Voisins —just think block party!  It's an official date of celebrating and having a convivial moment with your neighbors.  It's B.Y.O.B. and potluck.  It was started up by a Parisian group of friends to strengthen neighborly relationships, to reinforce proximity, create solidarity amongst neighbors, and to mobilize them against loneliness and exclusion.

These people are still partying nineteen years later as an official association.  With funding and sponsorship they have been able to help neighbors in difficulty; festive Christmas parties are held for those who don't have family near them, assistance is offered to disabled or elderly people, day care may be available to parents in need.

It's quite an organized event and it's a nice reminder to us city folks that we do live in a community... and that it is actually nice to have a chat with your neighbors.  If no one is taking the initiative to throw a Fête des Voisins in your buidling just go to your local town hall and inquire about it.    The town hall in each arrondissement offers Fête des Voisins posters to display in your residence so that your neighbors can't say they forgot about it.  T-shirts are also given out to the organizers of the event.

We just have to keep our fingers crossed and hope that the rain stays out of the way.   Our building loves a party and we usually spill out onto the pathway way past our bedtime. 

Come on out now and show some neighborly love!
 

Tricolored Tian With Provençal Vegetables

INGREDIENTS//Serves 2-4

• 3 cloves garlic, minced
• 1 small onion, diced
• 1 eggplant, sliced into 1/4 inch rounds
• 1 zucchini, sliced into 1/4 inch rounds
• 2 tomatoes, sliced into 1/4 inch rounds
• 2 sprigs thyme
• black pepper and sea salt, adjust accordingly
• 3 tablespoons olive oil

PREPARATION

Choose the vegetables with approximately the same diameter in size.  Then wash and slice them into rounds.

INSTRUCTIONS

Preheat your oven to 220° Celsius (approx. 425°F).

In an earthenware dish or baking dish add your minced garlic and diced onion.  Mix it up with a splash of olive oil and place it in the oven for 8-10 minutes.  You'll see the garlic sizzling and the onion sweating.

Take it out of the oven and let it cool slightly, then alternately lay your vegetables following a pattern of an escargot shell.  Start from the edge of the baking dish and continue the pattern until you reach the center.  If you have a rectangular dish just line them up in rows.

Generously sprinkle your choice of herbs (I used thyme this time), some sea salt, and black pepper.

Drizzle olive oil all over the vegetables.

Place it in the oven to bake at 220° C for 30 minutes and then cover the vegetables with a sheet of aluminum and place it back in the oven to back for another 15 minutes at 175° C (350° F).  The vegetables should be slightly roasted on the outside and tender on the inside.

Let it cool and serve at room temperature.


NOTE

The amount of vegetables I used above fit a 7 inch round (17.5 cm) earthenware dish.

Chocolate Dipped Physalis Berries

Chocolate Dipped Physalis Berries

Chocolate Dipped Physalis Berries

Just bring out a tray of these chocolate dipped golden berries after a nice evening around a dinner table and you'll get some gasps, oohs, and ahhs!  Not only do these present well, but pop 'em in your mouth and they are ready to set off a mini explosion of sweet ambrosia coated in its bittersweet counterpart.

Some of you may have noticed that I've gone MIA.  I've been at battle up against the French administration and got sucked into its big black hole in search of how to go about getting a driver's license without breaking the bank.  I'm slowly pulling myself out of this administrative conundrum as I don't have much guidance and every French person around me has gone the traditional route in going with an auto-école (the infamous driving school) which of course makes sense since they had to learn how to drive in the first place.  

Being a holder of a foreign license already puts me at an economical advantage since I know how to drive already.  I've applied as a candidat libre (one who is not registered with an auto-école) but its big disadvantage is that I have to process all my requests online and in return it spits out automated responses stating they would get back to me depending on whether or not I have provided all the information correctly.  Turnaround time can be anywhere from a week up to three weeks for your first file to be approved or rejected (as in my case).  I had to tack on an additional few more weeks of waiting time for my file to be approved so that I could finally book a date for the theoretical part of the exam.  If you are registered with an auto-école they direct you through the red tape.

I highly recommend for future candidat libres to start your application process straight away in order to get your file approved and then start preparing for the theoretical part of the exam.   Your file is valid for five years.  

My error was that I did it the other way around so by the time I was ready to take the exam I couldn't.  The time lapse while waiting for my file to be approved didn't help matters.  Whatever I had crammed into my brain certainly didn't stick around long enough to wait for my application to be approved by the police prefecture.

Once you pass the exam which takes a good 3 weeks of cramming—and it's not because I studied and took the exam in French (I get a big pat on the back for that)— you can move on to the practical driving stage where one has to log in a certain number of hours and then ask for a driver's test date.  That request alone takes at least two months and apparently we are supposed to be thankful as our new President Macron actually reduced the waiting time to 2 months for people like me applying as a candidat libre.  Supposingly, if I fail, I would have an eight to nine month waiting period until my next driver's permit test date.  Word around town is that the auto-écoles have a strong hold with the police prefecture so that they receive priority over the dates for the driver's permit test.

A driver's education in Paris is costly.  Driving schools offer packages but usually that alone doesn't get you to pass the exam so they also offer extra hours of class priced per hour or other package priced driving hours on top so one can expect to pay anywhere from 800 euros (if you are lucky) to 2800 euros and more. 

I'm awaiting my driver's test date.  It's been almost two months now and no word yet.  No hurry though as I have yet to start my driving hours either.   Tomorrow will be my first lesson on the streets of Paris!  Will keep you posted...xx- M


Chocolate Dipped Physalis Berries

INGREDIENTS//yields 25 pieces

• 25 physalis berries, rinsed and dried
• 50 grams dark chocolate 95%, melted
 

PREPARATION

Peel back the leaves and place them in a bowl then rinse them under water.  
Wipe the berries dry before dipping them into the chocolate.

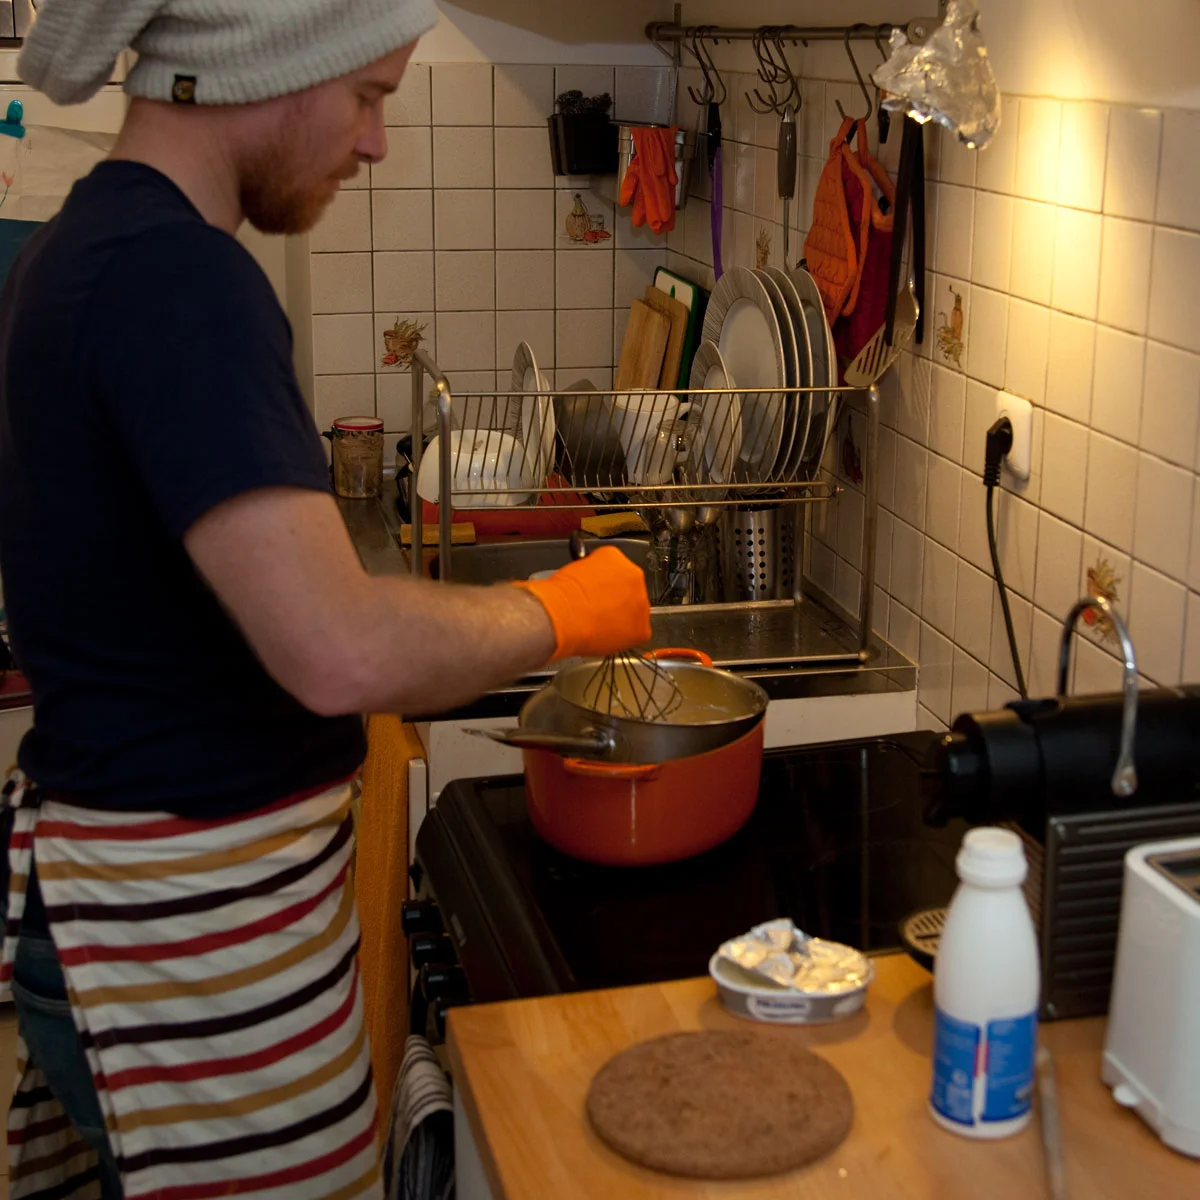
Prepare a bain-marie: I used a small pot and a ramekin.   Fill the pot with water halfway to the ramekin.   Take the ramekin out while you boil the water. 

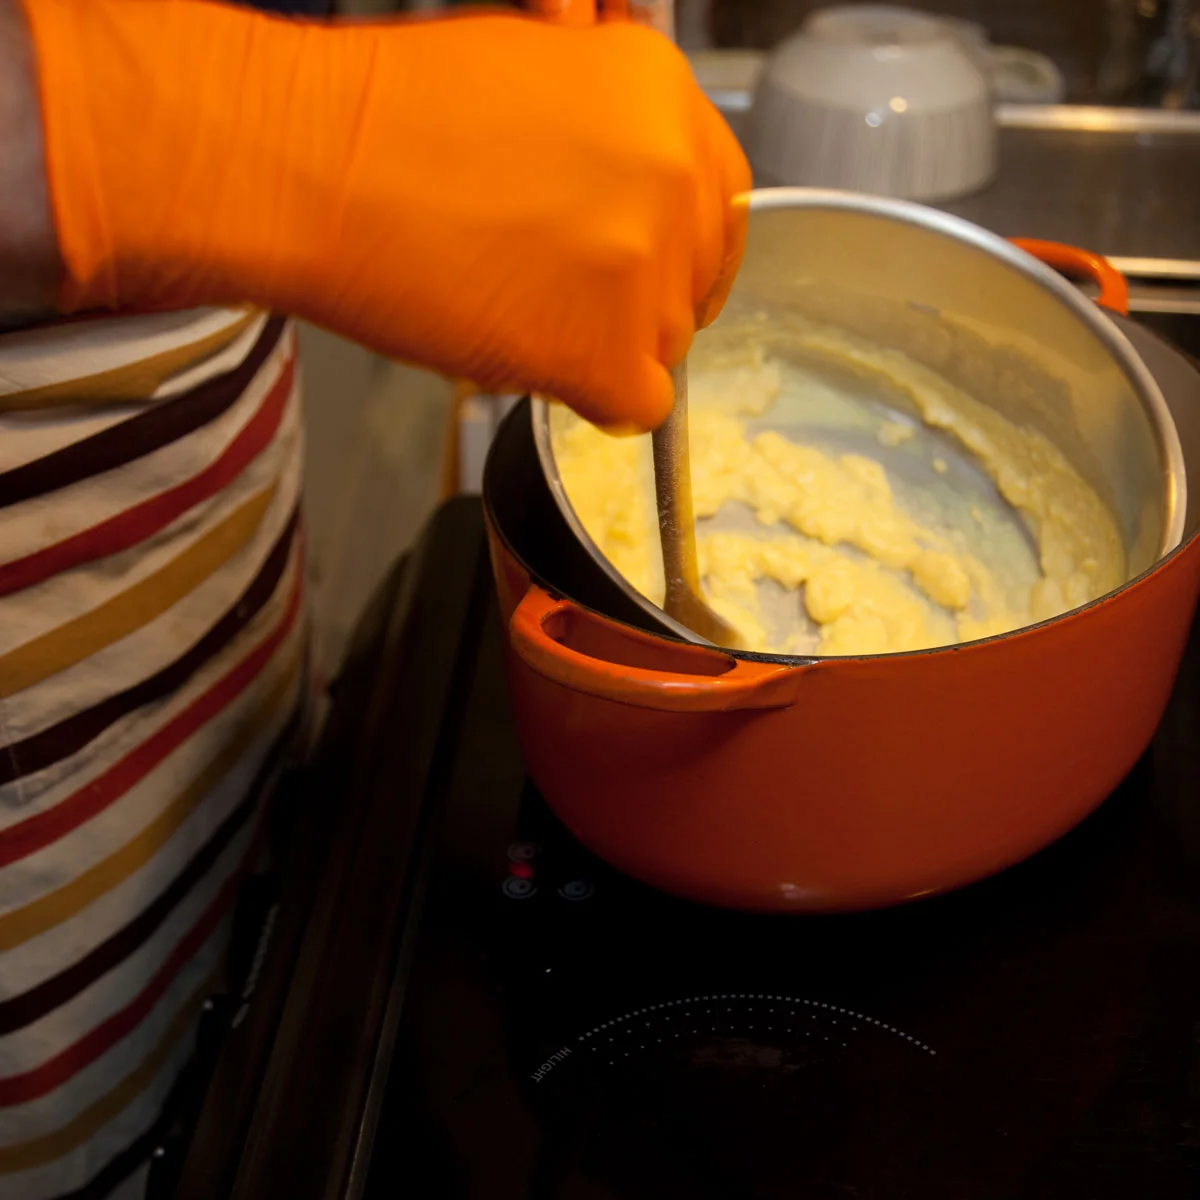
Break your chocolate into small bits and place them in the ramekin and place it in the hot water.

Stir the chocolate as it melts so that the chocolate is even and well mixed.


INSTRUCTIONS

Place a piece of parchment paper on your working space.

Take the ramekin out of the pot once the chocolate is melted.

Place it on a clear working space and begin dipping each physalis berry into the chocolate and lay them on a baking tray lined with parchment paper.  Be sure to space them out.

Let the chocolate set on its own or you can place it in the fridge for quicker results.


NOTE

I used 95% dark chocolate.  For a sweeter version you can use a chocolate with less cocoa bean.

Green Apple Leek Salad With Crispy Chickpeas

GreenAppleLeekSalad-2R .jpg

Fried chickpeas have been on my mind for nearly a month now.  Something I never considered doing until I ate some at a restaurant in Belleville called Le Grand Bain.  I remember crunching on this little pea that was mixed in with a salad that my gal pals and I ordered and thinking Yum, what is this crispy thing?  Chickpeas are a favorite in our family but we usually make regular hummus, beetroot hummus or just have it whole as a snack or mixed in with salads.

I was just waiting for the right time to experiment...

GreenAppleLeekSaladR.jpg

All set up in my kitchen lab,  I patted dry the chickpeas and placed them carefully into the frying pan.  After 5 minutes of sizzling, they started to brown.   I fished them out with a slotted spoon and let them cool down.  Et voilà!   Here we have some rather crispy tasting snacks with a creamy interior.    You can shake these fried chickpeas up in a paper bag with some herbs and spices or for those with a sweet tooth just add some brown sugar to the mix. 

I'm always looking for toppings that I can sprinkle and toss over a soup or a salad.    This is at the top of my list for the moment so you'll be seeing it in my future posts.

Green Apple Leek Salad With Crispy Chickpeas

INGREDIENTS//Serves 4

• 3 leeks, julienned
• 2 Granny Smith apple, match sticks
• 1 cup chickpeas, fried
• 170 grams crab meat, shredded (6 ounce tin or 1/2 cup ), or smoked salmon (optional)

Vinaigrette:

• 2 tablespoons olive oil
• 1 teaspoon Dijon mustard
• 1/2 lemon, juiced
• 1 tablespoon cider vinegar
• 1/2 teaspoon paprika
• black pepper, adjust accordingly

PREPARATION

Cut the top green part of the leeks off.  You can get rid of the outer stiff layer.  Wash the rest of the greens and store for use another time (vegetable brouillon).

Cut the end of the leek off and then slit the leek down the middle to rinse out any dirt.  Pat it dry.

To cut the leeks into fine julienne slices, fold the leek over in half (not lengthwise), press down and slice thinly lengthwise.

Prepare your steamer basket.  Place the leeks, cover , and steam. 

You want the leeks to be slightly soft but not completely. 

Then take it out of the steamer and run under cold water.

Pat it dry with some paper towels or a clean tea towel.

Fried Chickpeas:

Add some olive oil up to an inch and a half in a medium size pan or pot.   Turn on heat up to high.  Drop in a chickpea to see if the oil is hot enough to fry in.  The chickpea should sizzle.   Add the rest of the chickpeas making sure not to crowd and fry them up for about 5 minutes or until they start turning brown.  They should taste crispy on the outside and soft on the inside.

Use a slotted spoon to take them out and lay them over a fine wire rack (I used a mesh skimmer) or paper towels.


INSTRUCTIONS

In a large serving bowl add the vinaigrette to the leeks and mix thoroughly.  Let it marinate for about 15 minutes.

Combine the apples and the chickpeas and toss.  Add some black pepper accordingly.


Velouté d'Epinards, Fancy Name For Spinach Soup

SpinachSoupR.jpg

Either the green appeals to you or it doesn't but hey I'm not judging it by its color.  I got a eww from my son, Viktor, when I placed a bowl of this soup in front of him which led me to throw in a few ravioles (mini ravioli) to tempt him.  It worked.  He polished off the bowl and I couldn't help but feel smug about it.

Green happens to be one of my favorite colors.  There's something soothing about it along with the scent of fresh cut green grass on a hot summer's day.   During long family road trips as a kid Mum was always telling us to look out the window at the greenery.  "It's good for the eyes", she would say.   Green to me is a peaceful color and when I have a bowl of this soup set in front of me there is this moment of calm and I am grateful for the nutrients that are about to replenish my soul and connect me to Mother Nature.

This is a pure soup which leaves your palate clean and keeps your body feeling snug and toasty.

Vélouté d'Epinards

INGREDIENTS//Serves 6

• 400 grams spinach, fresh
• 2 tablespoons olive oil
• 1 medium size onion
• 2 cloves garlic
• 1 leek, chopped
• 2 medium size potatos, small cubes
• 2.5 cups vegetable broth
• 2 cups almond milk
• 1/4 teasoon chili powder ( I used Espelette red pepper)
• 1 sprig rosemary
• Black pepper and salt, adjust accordingly.

Toppings:

Fried or roasted chickpeas, toasted pine nuts, ravioles (I used ravioles du Dauphiné)


INSTRUCTIONS

In a large pot, heat the olive oil and then brown your onions and garlic.

Add the leek and potatoes and and cook until the leeks soften.

Add the vegetable broth and bring it all to a boil and then turn down the heat to let it simmer.  Throw in the sprig of rosemary, add the almond milk and wait until the potatoes are cooked through.

Finally add the spinach and let it cook until it starts to wilt. 

Turn off the heat and let it stand.  Take out the sprig of rosemary before whizzing up the soup.


NOTE

I enjoy this soup simply on its own but you can add ravioles, fried chickpeas, pine nuts, etc.
You can adjust consistency of the soup by adding less or more broth as well as keeping it more or less chunky by controlling the blending time.
 

Roasted Pumpkin Ginger Soup

Ingredients: onion, cardammon seeds, ginger, Esplette red pepper, coconut oil, coconut milk, vegetable broth, roasted pumpkin

Ingredients: onion, cardammon seeds, ginger, Esplette red pepper, coconut oil, coconut milk, vegetable broth, roasted pumpkin

I didn't think I could have mishaps with my camera while taking photos of food that doesn't move, food that sits still, and no-motion food but just before the hols I broke my 50mm lens taking pictures of the the raw veggie makis —um, let's just say I had two left feet while jumping over my very still food set.   Then, today my camera somehow fell out of my hand and took a dunk into the soup before splashing everywhere and all I could recall was orange patchy blotches everywhere. 

Clumsy, clumsy me, and a very lucky, lucky me as I had a protection filter that actually did what it was meant to do, protect my lens—close call.   We are all cleaned up now.

Soups are the thing for me lately.  I'm purging myself from refined sugar, dairy products, wheat, and alcohol this month so it's just easier for me to keep a big batch on hand and heat it up whenever I want.   Besides, it's less hassle when I don't have to think about what to eat myself.  Thinking for the three others in my family is plenty enough for me.  Wouldn't you agree?

I usually have a variety of dairy replacements at home but I don't exclude it.  We like to mix it up day to day so it makes it easier for me to snatch a bottle of dairy replacement out of the fridge when I am making something that normally needs some dairy product.  These days I'm just making more of a conscious effort of what I consume than usual.   I'm taking care of myself instead of neglecting myself.  I call it my period of restoration.   This is my jump start into the new year.

RoastedPumpkinGingerSoup-2.jpg

Roasted Pumpkin Ginger Soup

INGREDIENTS//Serves 4

• 700 grams pumpkin, roasted with skin
• 1 small onion
• 1/2 inch (1.5 cm) knob ginger
• 2 cardamom seeds
• 1 tablespoon coconut oil
• 1/4 teasoon chili powder ( I used Espelette red pepper)
• 2 cups (500ml) vegetable broth
• 1/2 cup (100ml) coconut milk

Toppings:

Crushed sea salt, grilled sesame seeds, pumpkin seeds
Pumpkin seeds, goji berries


INSTRUCTIONS

In a large pot, drop your coconut oil and add the onion, ginger, and cardammon seeds. 

Cook until the onion is brown. 

Add the vegetable broth.

Cut up your roasted pumpkin with the skin into chunks and add it to the pot along with the coconut milk and the chili powder.

Bring the soup to a boil.  Then turn off the heat and let it stand before you use your hand mixer or blender to liquify it.

Use a mortar and pestle and crush some sea salt, grilled sesame seeds, and pumpkin seeds.

Sesaon with this topping accordingly. 


Creamy Broccoli Soup Without The Cream

Creamy Broccoli Soup—and it's vegan.

Creamy Broccoli Soup—and it's vegan.

Slighty behind from all the holiday celebrations, nevertheless, Happy New Year!   After a fun-filled holiday in the south of France I returned to Paris only to meet "Flu"...

She was relentless and kept me homebound.  She had no plans for me to do a thing.  She wanted me all to herself.  So I obeyed and paid attention.   All I could do was to make offerings of fresh lemons and limes, slices of ginger, lots of honey, some golden powder named tumeric, and sea salt.    She wanted us to have a steam bath...many times.  I think I had 5, 6, 7, I dunno,  I was quite delirious really.  I can't say I much enjoyed bathing in my own sweat.  She finally realized that she overstayed her welcome and left me with some tidying up to do.

Back up on my two feet and I'm ready for some reboot!  I am thinking soups, soups, and more soups.  It's still brrr here and it's the best way for my family and I to get our veggie intake. 

Not being in the mood for dairy these days,  I easily replaced the cream and milky bit in this recipe with almond milk which was what I had on hand.  Give it a try.  I think you may be surprised.  You'll find a gorgeous creamy texture without the fat.  It's a light but very filling soup.   Keep healthy!   xx-M

Creamy Broccoli Soup

INGREDIENTS//Serves 4

• 1 broccoli head, cut into florets and roasted
• 4 cloves garlic, sliced, divided
• 3 tablesoon olive oil
• 1/2 teaspoon sea salt
• 1 tablespoon coconut oil or olive oil
• 1 carrot, chopped
• 1 celery stalk
• 1 onion, small
• 2.5 cups vegetable stock
• 1 cup almond milk


INSTRUCTIONS

In a large mixing bowl combine the broccoli, half of the garlic, olive oil, sea salt, and toss.

Pre heat the oven to 200° C ( 400° F°).

On a baking sheet spread out the broccoli and bake for 20 minutes until you see the tops get dark and toasty.

During this time, prepare the soup. 

In a medium size pot, add some coconut oil, onions, carrots, celery and cook until slightly softened.  Add your vegetable stock and bring it to a slow boil.

Add your roasted broccoli along with the almond milk and let it simmer until bubbling slightly.

Then turn off the stove and let it cool before whizzing it up in a blender or using your hand blender.


Pumpkin Roll With Lemon Zest Filling, A Light Version Of La Bûche de Noël

PumpkinLogCake2R.jpg

Buche de Noël is a traditional French dessert often served at a Christmas dinner.  You can find it everywhere during the holiday season.   Elaborately designed Yule logs can be found with a hefty price tag in chic patisseries but you can find industrial made ones and frozen ones in the supermarket too.

PumpkinLogCakeR.jpg

Traditionally made from a Génoise, a light sponge cake covered with chocolate, coffee, or chestnut cream, it is rolled up to resemble a log. 

The tradition of this log dates back to the Celtic times celebrating the winter solstice, the shortest day of the year.  The burning log was a symbol of the rebirth of the sun as well as an offering of thanks for its return.

As time passed the tradition of burning logs in large hearths were replaced by smaller burning stoves.   With all eyes on the center of activity, the burning log made its way onto the table as a decorative and edible tradition.

You'll be sure to find one at Christmas on most French table tops.  Happy Hols!  xx-M

Pumpkin Roll with Lemon Zest Filling

INGREDIENTS//Yields 1 roll

• 3 eggs, seperated
• 1/2 cup sugar, divided
• 2/3 cup pumpkin purée
• 3/4 cup all purpose flour (I used a blend of all purpose flour and chestnut flour)
• 1 teaspoon baking soda
• 1/2 teaspoon ground cinnamon
• Pinch of salt

Filling
• 200 grams cream cheese
• 30 grams butter
• 1/2 cup confectioner's sugar
• 1 teaspoon lemon zest, untreated


INSTRUCTIONS

In a large mixing bowl beat the egg yolk and half of the sugar( 1/4 cup) and then add in the pumpkin purée.

In a separate bowl combine the flour, baking soda, cinnamon, and salt.  Pour it into the wet mixture in parts and stir. 

In a mixing bowl, whip up the egg whites until it turns white and forms peaks.  Gently fold this into the above mixture until well combined.

Line a 15 x 10 inch baking pan with parchment paper and pour the batter across the pan.  Smooth it out with a spatula.

Bake at 190° Celsius for 12 minutes.  The cake should be spongy so that when you press down on it it should spring back.  Let it cool for a few minutes.

Spread out a kitchen tea towel on a flat working surface and dust it with some confectioner's sugar.  Turn the cake onto the towel and line up the ends of the cake and the towel.   Carefully peel off the parchment paper and begin to roll up the cake and towel together.  Then set it aside to cool completely.

Prepare your filling by beating the first three ingredients together until smooth and stir in the lemon zest.

Unroll the cake after it has cooled down completely and spread the filling all over it.

Roll it up again and sprinkle with confectioner's sugar when ready to serve.

Raw Vegetable Maki Wrapped in Chicory Leaves and Nori

WinterVeggieMaki2R.jpg

Here's a salad wrap to make our winter days brighter.  The idea of eating a salad on this very cold, blustery day was as dim as the grey, gloomy winter sky.   I just made some makizushi for the kids last night.  With no rice left, nor any salmon and avocados, I had a sugarloaf chicory staring at me from the fridge and my leftover cauliflower fluff (plain, grated cauliflower).  

I had been saving the sugarloaf chicory to use as a leaf wrap for another dinner endeavor but that moment was now.   So I seized it and pulled out whatever else I could find from the fridge.

Oh and by the way, cauliflower fluff is used as a rice replacement for those Paleo followers.   Hmpf—I love rice too much to do that!

Well, I found myself in a situation you see... and guess where the cauliflower fluff ended up?  In my maki.

I quickly mixed up some tahini-tamari sauce with a splash of lemon juice to dip these relishing novelties into.   And there you have it, a bite size salad bursting in your mouth.

WinterVeggieMakiR.jpg

Raw Vegetable Maki

INGREDIENTS//Yields 1 roll

• 1 sheet of nori
• Lettuce leaves (I had radicchio and sugarloaf chicory on hand)
• Carrot, raw and match stick size
• Beetroot, raw and match stick size
• Cauliflower, grated


INSTRUCTIONS

Place a piece of nori flat on a bamboo rolling mat lining up the edges.  Starting from the bottom up line a layer of your choice of salad greens until half way up.  I used winter salad leaves like radicchio and sugarloaf chicory since I had it on hand and to add some color to the maki.

Spread your grated cauliflower evenly over your salad greens.  Then add a layer of carrots and beetroot.

To roll, lift the mat up, roll and tuck in the edge of the nori.  Continue to roll over the contents while applying some pressure until you reach the top.  You want the roll to be tight so the ingredients don't fall out.

Slighty wet the top edge of the nori with water to seal the maki.

Using a sharp knife cut the roll in half, then in thirds for 6 bite size pieces.


Scrambled Eggs à la Française

Prepare a bain marie.  Fill a pot up with water a little less than midway and bring it to a boil.

Prepare a bain marie.  Fill a pot up with water a little less than midway and bring it to a boil.

In a heat proof bowl (we didn't have one here so we improvised) add your ingredients.

In a heat proof bowl (we didn't have one here so we improvised) add your ingredients.

One of the best ways to start a morning is when you are invited over for an impromptu breakfast.  What was supposed to be a quick café catch up turned into a simple power breakfast à la française.  Meet the man with the orange gloves, Fred, who is my neighbor down the road, an actor, and a clown...

Fred, explaining the basics.

Fred, explaining the basics.

Stir during this slow cooking process.

Stir during this slow cooking process.

Really , Fred is a clown.   I mean besides having a bit of fun in the kitchen, he is a professional clown in the performing arts.   You can usually catch his performance in Paris.  It's a fun family moment to share.   Check in for his next performance here.

Recently, he acquired some heavy duty, vibrant orange cleaning gloves and he was showing them off to me.   Parisian kitchens can be tiny and easily cramped with stuff so he decided to keep the gloves on to distract from the overflowing surroundings and to draw attention on his scrambled eggs à la française that he was about to cook up for me.   This was all in good fun but as an afterthought...probably a safety hazard to keep the gloves on.  Do Not Replicate!!  Burnt rubber stuck to skin will hurt!!

MY_20171120_FredEggs_0005R.jpg
MY_20171120_FredEggs_0006R.jpg

This morning I was getting an all in one surprise package: a cooking lesson and a power breakfast. 

I thought scrambled eggs was just cracking an egg into a pan and stirring it all up until scrambled.  Who knew? 

Patience though.  This is a slow cooking process and adding good whole fat to the eggs adds taste to this creamy version of scrambled eggs.    Do not expect a light, airy, and fluffy version.   It makes a great spread over toast. 

MY_20171120_FredEggs_0007R.jpg
MY_20171120_FredEggs_0008R.jpg

Et voilà...

Scrambled Eggs and Beans

Scrambled Eggs and Beans

Scrambled Eggs à la Française

INGREDIENTS//Serves 2-3

• 6 eggs, preferably free-range or organic
• 2 tablespoons buttermilk, crème fraîche, crème liquide, or whole milk (something fatty will do—we even replace it with Philadelphia cream cheese)
• 10 grams butter


INSTRUCTIONS

First prepare a bain marie.    Fill a medium pot with water less than halfway and bring it to a boil.

During this time prepare your eggs.

Add the eggs in heat proof bowl and beat it with a fork. 

Add the buttermilk and stir. 

Now place the bowl over the pot of simmering water and stir your egg mixture around with a spoon. 

This is a slow cooking process.  It takes about 15 minutes or so.

Once it starts to get creamy, take the bowl off the pot and add the butter.

Continue stirring until it gets scrambled.


NOTE


Improvisation plays a huge role in the kitchen for me and as you see from the photos we don't have all proper or called for material like a heat proof bowl, nor buttermilk, etc.  Fred used Philadelphia cream and a heavy cream with the eggs.  It turned out fantastic.  So use your instincts and don't be put off from making something just because you don't have the exact ingredient.

Buddha Bowl #2 Featuring Curcuma Cauliflower

Buddhabowl2R.jpg

Curcuma, Tumeric, call it what you like.  They both have curcumin as the main active ingredient and apparently this golden spice has great health attributes.  A commonly used Ayurvedic spice, not only does it add a vibrant color to your dish and a nuance to your palate when added in cooking but we can benefit from it too.  Apparently it promotes digestion and supports the immune system and is a a potent antioxidant with anti-inflammatory properties.  That's just a short list of benefits. 

I love adding this spice to my pasta, rice, and other foods when I feel it's appropriate in taste because everything it touches turns golden in color.  It's the same with beets and the deep blood violet color it rubs off on food turning everything pink-like: beetroot hummus dip and beetroot crackers.

Adding some tumeric to my finely chopped up cauliflower and sautéeing it in some fine fatty butter with garlic is one of my favorite ways to eat cauliflower.  This is one of best ways to cook up a head of cauliflower.  You can add it as a topping over salads, rice, pasta, and serve it as a side dish.  My kids are finicky about this vegetable but when it's in a pasta salad there's no doubt about it.

Curcuma Cauliflower

INGREDIENTS//Serves 6

• 1 head cauliflower, finely chopped or grated
• 30 grams butter
• 2 cloves garlic, minced
• 1 teaspoon curcuma (tumeric) powder
• salt, adjusted to taste
• 1/2 cup parsley, finely chopped

INSTRUCTIONS

In a large skillet over medium to high heat, melt your butter and then add the garlic and let it  sizzle for about 30 seconds.

Then sauté the cauliflower with garlice in the butter for about five minutes.  Be careful not to over cook as it will turn soft.  I like the cauliflower to be slightly crunchy on the outside and tender on the inside.  So keep tasting and cooking it until you find the texture you like.

Add the curcuma, salt, parsley, and give it a quick stir.  It's ready to be served.


Good 'Ole Fashioned Apple Sauce

Speckled Garden Apples

Speckled Garden Apples

It was fall break and many families took advantage of this time to travel within our beautiful country, France.   We went to Marseille in the south of France to visit my belle mère and of course I came back with 3 liters of olive oil.

I reaped in the goods from friends as well: calissons d'Aix au chocolat, piment d'Esplette, sel de Guérande.  Add a crate of garden apples to that and a shoebox of whole shell walnuts and I feel like it's the night before Christmas.

Pictured above are my speckled beauties from the garden of Eden—literally.   Eden goes to school with my daughter, Mila and she picked these apples for us.

From a garden in Limousin to my Parisian table...here we have some good 'ole fashioned apple sauce!


Apple Compote

Apple Compote

Good 'Ole Fashioned Apple Sauce

INGREDIENTS//Yields 450 ml or 2 cups

• 11 Golden apples, peeled, deseeded, sliced
• 1 cinnamon stick
• pinch of lemon zest
• 67 grams (1/3 cup) brown sugar
• 100 ml (a little less than 1/2 cup) water

INSTRUCTIONS

In a large sauce pan or Dutch oven, combine all your ingredients and cover with a lid.  

Bring it to a boil on high heat and then turn down the heat to let it simmer until it all softens.  It should take about 20 minutes.

You can either mash the apples by hand for a chunkier consistency or use a blender for a purée.

Crustless Potato Leek Tart

PotatoLeekTart1R.jpg

This dish can easily be made with a crust as well but today was one of those days I figured my family could do without wheat in their meals.  Without the crust it's a rendition of the Spanish tortilla where one cooks down the potatoes and the eggs in a frying pan over the stove top and then flips it over.

In this version, I prepared the potatoes and the leeks by cooking them first, then lining the pie pan with the potatoes and topping it off with all the ingredients and popping it into the oven so that the end result you get a nice looking crust of potatoes. 

My potato crusted tart also came out thinner than a Spanish tortilla.  It makes a great combo with a salad served along the side.

PotatoLeekTart2R.jpg

Crustless Potato Leek Tart

INGREDIENTS//Serves 4

• 2 big potatoes , sliced thinly
• 2 leeks, sliced thinly
• 6 eggs
• 2 garlic cloves, minced
• 1 teaspoon cumin powder
• 1/2 teaspoon dried chili powder (I used Esplette and I always have Korean red pepper powder on hand)
• Sea salt, adjust accordingly (I used 1 teaspoon)
• Fresh black pepper, adjust accordlngly
 

INSTRUCTIONS

In a large pan, heat up some cooking oil.   Then add your potatoes and cook them until they turn translucent and slightly golden around their sides. 

Take it out of the pan and place it in a bowl on the side.

In the same pan, add your leeks and cook them until they soften up.

Take it out of the pan and place it in a bowl on the side.

Using a small glass mixing bowl, combine your eggs, garlic, cumin, chili powder, salt, and black pepper.  Mix all together.

Using a tart mould (around 10 inches in diameter, 1-1/2 to 2 inches deep or 25 cm in diameter, 4 cm deep), line it with the potatoes up to the sides.  You will have some leftover and you will use this later.

Now spread the leek over the potato lined tart mould and then pour in the egg mixture.

Place the leftover potato slices on top.

Preheat the oven to 180° Celsius (approx. 350° F)

Then place it in the oven for 25-30 minutes until set.


Pumpkin Lentil Soup

PumpkinLentilSoupR.jpg

This is a very hearty soup.  It's a good time for it in Paris since the weather in Autumn goes from grey, cold days to vibrant sunny days where we still need a scarf wrapped around our necks—and it's not just a fashion statement.

The lentils beef up this soup and it makes it a nice replacement to potatoes,  and you'll get some added protein in.      As we are surrounded by an abundance of boulangeries in this city, nothing beats a straight out of the oven baguette.   Tear off a piece, lather it with some slightly salted butter, and drench it in this soup.  Just be sure to have enough leftover to mop up the bottom of your bowl.

PumpkinLentilSoupRCarre2.jpg

Pumpkin Lentil Soup

INGREDIENTS//Serves 6

• 1 medium size yellow onion
• 1 litre vegetable broth
• 1 small pumpkin (around 800 grams), cut into small chunks
• 124 grams (1 cup) lentils
• 1 carrot, chopped into chunks
• 1 bay leaf
• 1 teaspoon of curcuma (tumeric)
• 1/2 teaspoon dried chili (I used Esplette and I always have Korean red pepper powder on hand)
• salt, adjust accordingly to taste


INSTRUCTIONS

In a large Dutch oven on medium heat add a tablespoon of olive oil and cook your onions until translucent and soft.

Increase the heat.  Add your vegetable broth, the pumpkin, the lentils, the bay leaf, and the carrot and bring it to boiling point.  Then turn down to low-medium heat and cover.

Let it simmer for about 30 minutes or until the pumpkin and lentils are cooked (they will have softened up, and if your pumpkin is slighty harder than the lentils, it's fine.  It will be blended together).  Stir in your tumeric and chili powder.

Let it cool down enough so that you can pour it in a blender and whiz it all up. 

To reheat your soup, pour it back into the Dutch oven and heat at low heat.